
Resident Evil 9 Spore Source Zombie Church Guide: Glowing Weak Points & Gas Canister Strategy

The Spore Source Zombie in Resident Evil 9 turns the church into a bullet hell nightmare with its glowing weak spots that shrink and shift while endless spore-headed minions swarm your position, draining your ammo reserves and forcing panic moves that get you cornered in tight pew spaces. If you are struggling to spot those bioluminescent targets while managing adds and conserving shells for the shotgun, this guide breaks down the exact kiting pattern, resource priority, and melee execution timing needed to drop this fungal monstrosity without bleeding dry your inventory before the final phase.

New Player Essentials: New players often stand still trying to line up perfect shots on the glowing spots. This gets you swarmed and killed instantly. Keep moving in circles around the pews at all times. Save your grenades exclusively for the spore-headed adds that spawn after the regular zombies die. Those gas canisters scattered around the church deal massive damage to the boss, but only if you throw them directly at his body. Do not waste them on trash mobs. Once he stumbles, rush in immediately for the melee prompt. Delaying costs you precious DPS windows.
Table of Contents
1. Core Mechanic: Glowing Weak Points and Movement
2. Phase One: Clearing Trash and Scavenging Resources
3. Phase Two: Heavy Damage Rotation
4. Phase Three: Melee Execution and Cleanup
1. Core Mechanic: Glowing Weak Points and Movement
During Leon's sniper sequence, cut through the cemetery and enter the church. The Spore Source Zombie waits inside with multiple glowing bioluminescent tumors covering its body. These are your only target.
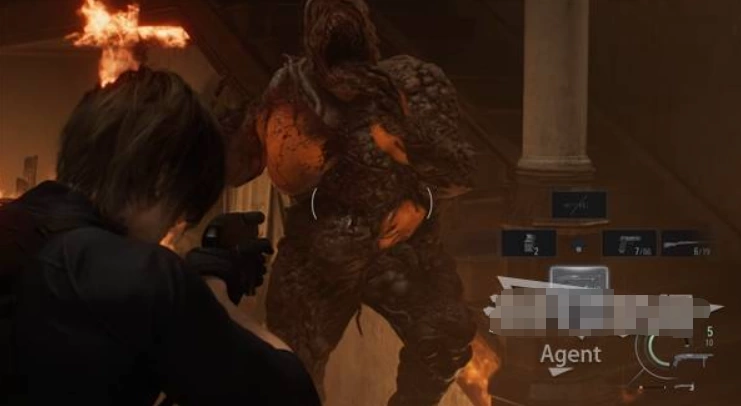
Load your shotgun and blast these glowing areas. The tight spread helps you hit the moving weak points even when you are not perfectly aimed.
Critical Rule: Never stop moving. Run circles around the central pews constantly. Standing still invites his charge attack and allows the minions to surround you. Keep that distance open.
2. Phase One: Clearing Trash and Scavenging Resources
He will spawn regular zombies first. Clear these fast with pistol headshots to conserve shotgun ammo. Once the normal trash dies, spore-headed variants emerge from the corpses. These are tankier and move faster.
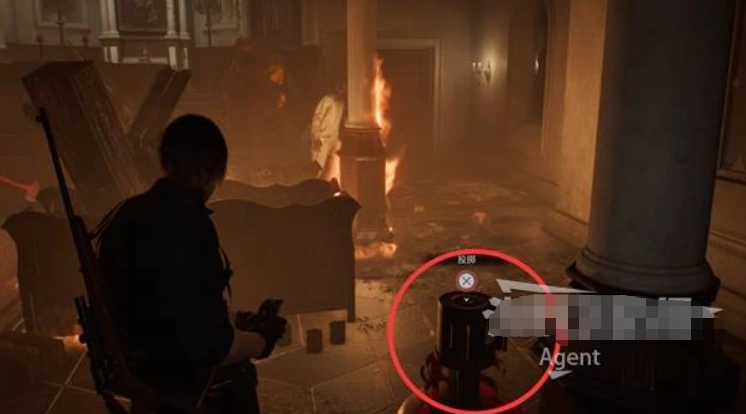
When three or more spore-heads surround you, toss a grenade immediately. Do not hesitate. This clears the board and gives you breathing room to focus on the boss.
Gas Canister Priority: Grab the red gas canisters lying around the church walls. Throw these directly at the Spore Source Zombie for explosive damage that staggers him instantly. Using them on adds is a waste. Save every canister for the boss body.
3. Phase Three: Melee Execution and Cleanup
Once the glowing weak points take enough damage, he will kneel and enter a stunned state. The camera will zoom in slightly. Sprint to his side immediately and trigger the melee attack prompt. This deals massive damage and saves ammo.
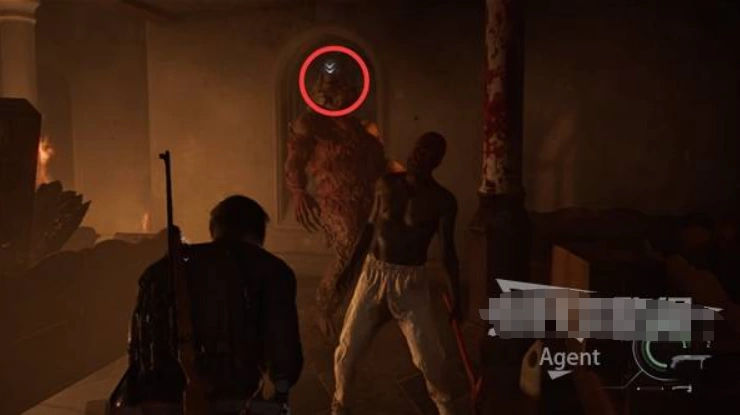
Weapon Throwing: Pick up any weapons dropped by dead minions. You can throw these at the boss for bonus damage while reloading your primary guns. Every bit of damage helps.
Final Burn: After exhausting your grenades, gas canisters, and shotgun shells, switch to your handgun. Pop a few rounds into any remaining weak spots. He will drop after three or four clean hits.
Key Takeaways:
1. Shotgun spread hits the shifting weak spots easier than precision rifles.
2. Circle the pews constantly. Stopping gets you surrounded and dead.
3. Grenades are for spore-headed adds only. Do not waste them on normal zombies.
4. Gas canisters deal massive boss damage. Throw them directly at his body.
5. Rush the melee prompt the second he stumbles. Delaying wastes your DPS window.
6. Throw dropped weapons while reloading to maximize damage uptime.
- Share on X
- Share on Reddit
- Share on Facebook
- Share on Telegram
-
Scan QR Code
Related Articles
- How to Customize WoW Interface Per Character Without Messing Up Your Alts - Best UI Setup Guide 2026
- Crimson Desert Kingshield Mountain Puzzle - Exact Solution Guide
- Agent 17 How to Proceed With Erica - Fast Walkthrough Guide
- Diablo 4 Season 14: Where to Find Summon Ae'grom on the Warlock Skill Tree - Complete Location Guid
- Peeping Dorm Manager Walkthrough Guide: Unlock All Endings and CGs
- ORGY DICE Complete Walkthrough: Fan Grind Strategy, Character Route Guide, All CG Unlock Method
- Immoral Bathhouse Walkthrough: Complete Character Route Guide, CG Unlock, Debt Clearance Strategy
- BUNNY GARDEN 2 Walkthrough
- Alice's Cradle Visual Walkthrough Guide
- The World That Never withers and the Flower of the End Walkthrough: Haru True End Guide & Route Unlo